Web conferencing
- Jonathan Hung
- Former user (Deleted)
- Allison Bloodworth
- Jess Mitchell
Macromedia Breeze is a web-conferencing tool that allows multiple participants to collaborate using video, audio, text chat, screen sharing and other tools, all from within a web browser.
Breeze "conference rooms" are hosted on a server and clients login using their web browser to participate.
Accessing Fluid Breeze Rooms
There are three Breeze rooms available for the Fluid project to use. They are open and any one collaborating on the project is welcome to take advantage of them.
To access one of the Fluid Breeze rooms, enter one of the following web addresses into your browser:
- connect.ocad.ca/fluid-work
- breeze.yorku.ca/fluidwork
- breeze.yorku.ca/fluidcollab
- breeze.yorku.ca/fluidoverflow
Hosting a Breeze meeting
If you want to host a Breeze meeting, but the room you want to use is occupied, then use one of the other Breeze rooms listed above.
The first time you visit the Breeze room you will see a screen that looks like this:
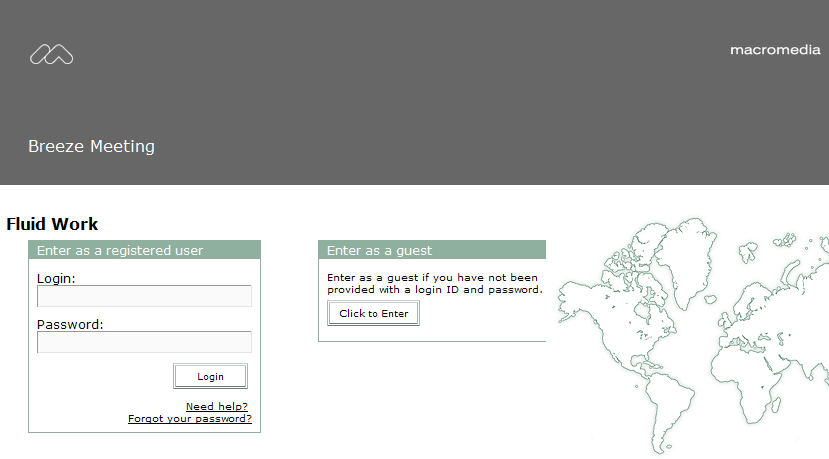
In majority of cases you will enter as a Guest, so click the "Click to Enter" button under "Enter as a Guest" section
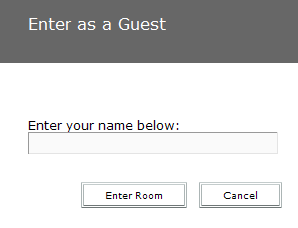
You will then be asked to enter your name.
Once you have entered a descriptive name, click "Enter Room".
Setting up Breeze
Depending on the hardware on your computer and the functionality you would like, you will need to configure a combination of sound output, microphone, and video camera.
Configure your Sound Output and Microphone
Connect your sound output device (i.e. headphones or speakers).
In your browser, login to one of the Fluid Breeze conference rooms ("Accessing Fluid Breeze Rooms" above).
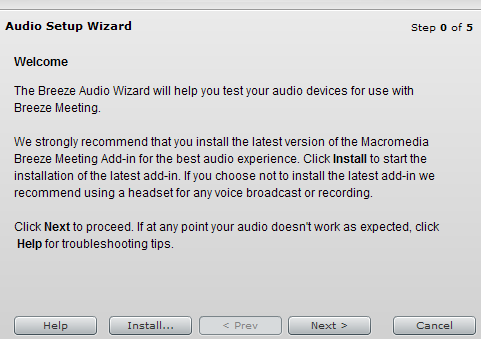
Under the "Meeting" menu near the top-left corner of the screen, select "Audio Setup Wizard".

Follow the prompts in the Audio Setup Wizard to configure your audio devices.
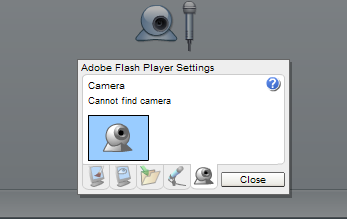
Configure your Web Camera
Connect your web camera.
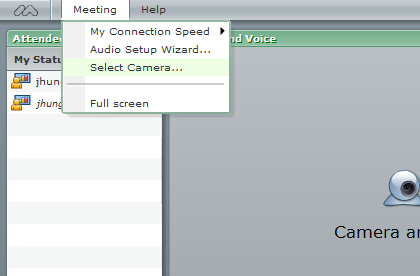
In your browser, login to one of the Fluid Breeze conference rooms ("Accessing Fluid Breeze Rooms" above)
Under the "Meeting" menu near the top-left corner of the screen, choose "Select Camera
If your camera is working properly, it will be detected and listed as one of the cameras available. Select a camera and click "Close".
Using Breeze from different computers
If you use Breeze from different computers, you may need to set up Breeze again to account for different hardware.
The Breeze Interface
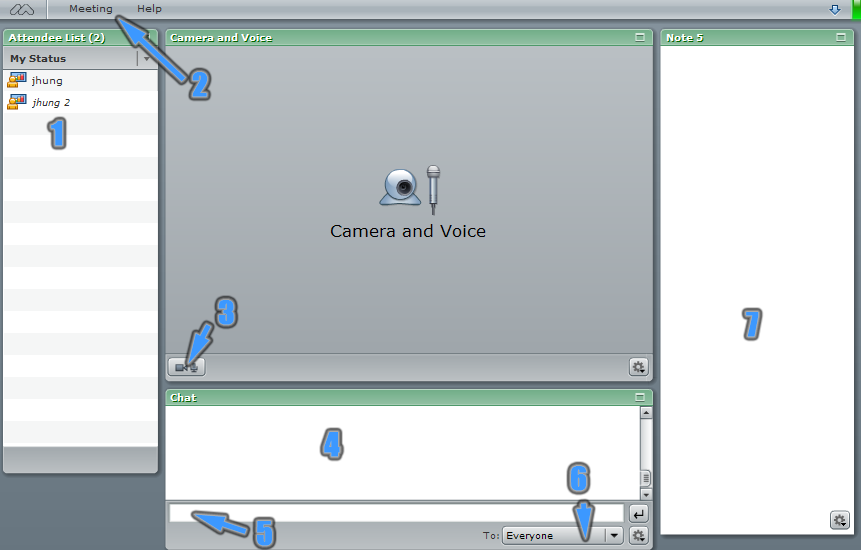
- Participants currently in the Breeze room.
- Breeze configuration menu.
- Activate / deactivate your microphone and web camera.
- Text chat window - any chat via text will appear here.
- Type in this space to text chat with participants.
- Text chat recipient - change this if you want to make text chat public / private.
- Note board - a common area where all users can type notes, paste text, and share ideas.
Controlling Your Video and Microphone on Breeze
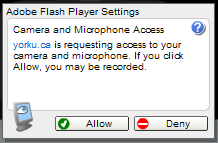
After your hardware is properly configured for Breeze (see "Setting up Breeze" section above), click the button to activate your web camera and microphone.
Select "Allow" when prompted with this message:
You will now see the following controls for your web camera and microphone:
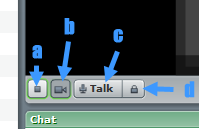
a. Web Camera: Stop / freeze - click this button when you want to stop the camera from sharing video.
b. Web Camera: Start - click this button when you want share your web camera with other participants.
c. Microphone: "Hold to Talk" - press and hold this button to activate your microphone. Holding this button to talk for long periods may be inconvenient, thus see point "d" below.
d. Microphone: "Hands Free" - press this button to activate your microphone (thus "locking it down"). This will activate your microphone until this button is pressed again.
Avoid microphone feedback
While using "Hands Free" mode is convenient, consider turning it off to let others know you are done speaking, and to reduce the risk of audio feedback.