This documentation is currently being moved to our new documentation site.
Please view or edit the documentation there, instead.
If you're looking for Fluid Project coordination, design, communication, etc, try the Fluid Project Wiki.
Tutorial - List Reorderer
This tutorial has not yet been updated to reflect the latest APIs.
This page will walk you through an example of using the Fluid Reorderer's reorderList() function to reorder a list in an HTML file.
This tutorial assumes that:
- you are already familiar with HTML, Javascript and CSS
- you are familiar with what the List Reorderer is and does
- now you just want to know how to add it to your file.
For technical API documentation, see List Reorderer API and Reorderer API.
Tutorial: How to Use the List Reorderer
Scenario
You are organizing a small conference, and there is lots to do. Being the organized person you are, you create a to-do list. You'd like to use the Reorderer to allow the order of items to be changed. This tutorial will show you how to use the Fluid List Reorderer for this.
There are five basic steps to using the List Reorderer in your application:
- Setup: Download and install the Fluid Infusion library
- Step 1: Prepare your markup
- Step 2: Write the script
- Step 3: Add the script to your HTML
- Step 4: Apply styles
The rest of this tutorial will explain each of these steps in detail.
This component is in Production status
Join the infusion-users mailing list and ask your questions there.
Setup: Download and install the Infusion library
- Get the current source code from github as a ZIP file: https://github.com/fluid-project/infusion/archive/master.zip
- Unpack the zip file you just downloaded and cd into the "infusion-master" folder that results.
- If necessary install Node.js (http://nodejs.org/download/) and Grunt (“npm install -g grunt-cli”).
- Make your own custom build by running the “grunt” command in the Terminal. See the README.md file for instructions on how to make a custom build of Infusion.
- The grunt command will create a zip file in the products folder. Unzip that file and move the resulting
infusionfolder somewhere convenient for your development purposes, likely in alibfolder in your site hierarchy. This
infusionwill include a single file containing all of the JavaScript you need:infusion-custom.js. You will link to this file in the headers of your HTML files.
Step 1: Prepare your markup
Let's assume that you are starting with an HTML file, called todo-list.html, that contains an ordered list:
<ol>
  <li>Select the date</li>
  <li>Create promotional plan
    <ul>
      <li>web site</li>
      <li>print materials</li>
    </ul>
  </li>
  <li>Book facilities</li>
  <li>Book block of hotel rooms</li>
  <li>Develop a conference daily schedule of events</li>
  <li>Book speakers
    <ul>
      <li>Keynote</li>
      <li>Internal/employee</li>
    </ul>
  </li>
  ...
</ol>
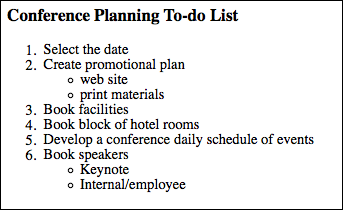
In a browser window, this might look something like this:
The List Reordeer needs to know about the 'container' of your list. In this case, that would be the <ol> element. The Reorderer accepts a jQuery selector, so you can choose any method that will uniquely identify the <ol> element. We'll attach a unique ID to it:
<ol id="todo-list">
  <li>Select the date</li>
  ...
This example uses an ID, but you might, for example, use a CSS class, or the element hierarchy - whatever works, so long as it uniquely identifies the right element.
You also need to tell the Reorderer which of your list items should be reorderable. Perhaps the first item on your list, "Select the date," really needs to stay the first item, since everything else depends on the date. You don't want that item to be movable, so you can't just make every list item orderable.
You'll tell the Reorderer which items are to be orderable with another jQuery selector. Let's add a CSS class for that, say movable:
<ol id="todo-list">
  <li>Select the date</li>
  <li class="movable">Create promotional plan
    <ul>
      <li>web site</li>
      <li>print materials</li>
    </ul>
  </li>
  <li class="movable">Book facilities</li>
  <li class="movable">Book block of hotel rooms</li>
  <li class="movable">Develop a conference daily schedule of events</li>
  <li class="movable">Book speakers
    <ul>
      <li>Keynote</li>
      <li>Internal/employee</li>
    </ul>
  </li>
  ...
</ol>
As with the ID on the <ol>, we can use any jQuery selector. For example, we could attach a unique ID to each movable <li> with a unique prefix, maybe mylist-movable1, mylist-movable2, etc. Then we could use the jQuery selector [fluid:id^=mylist-movable]
That's all - these are the only changes you need to make to your HTML.
Step 2: Write the script
You'll need to create a file to contain your initialization script - the script you write to apply the Reorderer to your list.
In the example of the todo list, create a file called todo-list.js and in this file, write a function that looks like this:
jQuery(document).ready(function () {
    var opts = {
        selectors: {
            movables: ".movable"
        }
    };
    return fluid.reorderList("#todo-list", opts);
});
selectors is not the only option that can be used to configure the List Reorderer. For more information, see the List Reorderer API documentation.
In this function call, the first parameter, "#todo-list", is a jQuery selector identifying the element with the ID "todo-list". The second parameter is a Javascript object that contains options for customizing the List Reorderer. One of the options is called selectors, and we're using that options to provide a jQuery selector identifying elements with the CSS class "movable". That's all the information required by the fluid.reorderList() function.
By enclosing the function call inside jQuery(document).ready(), we ensure that the list is fully rendered before we apply the Reorderer to it.
Step 3: Add the script to your HTML
You'll need to add your initialization script, along with the Fluid library, to you HTML file. In the header of the file, link to the Javascript files with <script> tags:
<script type="text/javascript" src="infusion-1.2/InfusionAll.js"></script>
<script type="text/javascript" src="todo-list.js"></script>
Keep in mind that the InfusionAll.js file is minified - all of the whitespace has been removed - so it isn't really human-readable. If you're using the source distribution and you want to be able to debug the code, you'll want to include each of the required files individually. This would look like this:
<script type="text/javascript" src="lib/jquery/core/js/jquery.js"></script>
<script type="text/javascript" src="lib/jquery/ui/js/jquery.ui.core.js"></script>
<script type="text/javascript" src="lib/jquery/ui/js/jquery.ui.widget.js"></script>
<script type="text/javascript" src="lib/jquery/ui/js/jquery.ui.mouse.js"></script>
<script type="text/javascript" src="lib/jquery/ui/js/jquery.ui.draggable.js"></script>
<script type="text/javascript" src="framework/core/js/FluidDocument.js"></script>
<script type="text/javascript" src="framework/core/js/jquery/jquery.keyboard-a11y.js"></script>
<script type="text/javascript" src="lib/json/js/json2.js"></script>
<script type="text/javascript" src="framework/core/js/Fluid.js"></script>
<script type="text/javascript" src="framework/core/js/FluidIoC.js"></script>
<script type="text/javascript" src="framework/core/js/FluidView.js"></script>
<script type="text/javascript" src="framework/core/js/FluidDOMUtilities.js"></script>
<script type="text/javascript" src="framework/core/js/DataBinding.js"></script>
<script type="text/javascript" src="framework/core/js/FluidIoC.js"></script>
<script type="text/javascript" src="components/reorderer/js/ReordererDOMUtilities.js"></script>
<script type="text/javascript" src="components/reorderer/js/GeometricManager.js"></script>
<script type="text/javascript" src="components/reorderer/js/Reorderer.js"></script>
But all of these individual files are not necessary to make it work - the InfusionAll.js file has everything you need.
That's it! That's all you need to do to make your list reorderable!
Step 4: Apply styles
If you look at your file in a browser now, it doesn't look any different than it looked before - there's no way to tell that your list items are reorderable. That's what the styles are for.
There are a number of "interesting moments" that happen when dealing with a reorderable list. These include, for example, when the mouse hovers over a reorderable item, or when an item is selected using the keyboard. The Reorderer automatically applies CSS classes to the list items to mark these interesting moments. You can use these classes to define styles that inform users of the moments.
The CSS classes that are applied by the Reorderer, and the 'interesting moments' they are used for, are described below.
The class names given below are the defaults. It is possible to override these using the styles option, if you desire. For information on how to do this, see the List Reorderer API.
Class: "fl-reorderer-movable-default"
What: any item that is orderable
When: default state
Why: so that users can know that the item is orderable
Sample style:
.fl-reorderer-movable-default{
    background-color: #eee;
}
Class: "fl-reorderer-movable-selected"
Applied to the element that has been selected. The selected item can then be moved using keystrokes
Sample style:
.fl-reorderer-movable-selected{
    background-color: #ddd;
}
Class: "fl-reorderer-movable-dragging"
Applied to an element while it is in the middle of being dragged
Sample style:
.fl-reorderer-movable-dragging {
    background-color: lightyellow;
}
Class: "fl-reorderer-movable-hover"
Applied to an element while the cursor is hovering over top of it
Sample style:
.fl-reorderer-movable-hover{
    background-color: lightyellow;
    cursor: move;
}
Class: "fl-reorderer-avatar"
Applied to a clone of the dragged element that is carried around with the cursor while being dragged
Sample style:
.fl-reorderer-avatar {
    opacity: 0.55;
    width: 300px;
    border: 0;
}
Class: "fl-reorderer-dropMarker"
Applied to an element that is created and used to indicate where the item will end up when it is dropped
Sample style:
.fl-reorderer-dropMarker{
    background-color : red !important;
    height:2px !important;
    padding:0 0 0 0 !important;
    border-width: 0px !important;
    list-style-type:none;
    font-size:0px;
    line-height:0px;
    overflow:hidden;
}
It is also a good idea to set the padding for the lists. If no padding is set, the drop marker may be covered by the list elements
Sample style:
ol li {
    padding: 5px;
    margin: 5px;
}

ul li {
    margin:0px;
    padding:0px;
}
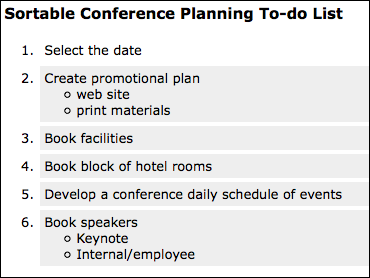
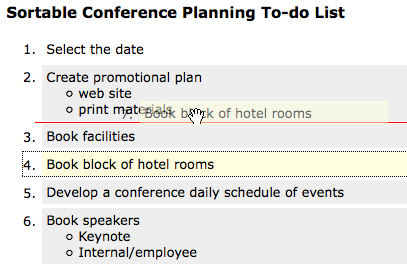
If we add a stylesheet with these styles (along with some global styles to make the font look a bit nicer, etc.), your list will look like this:
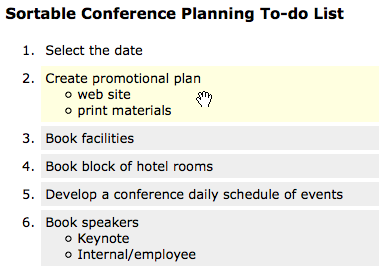
When you hover over an item, it will be apparent:
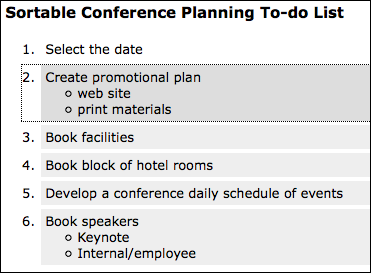
If you use the tab and arrow keys to select an item, you'll be able to tell:
And while you're dragging, you'll be able to tell where the drop will happen:
