Getting Started With Node.js
Installation steps:
- Download a clean slate Eclipse Platform for your operating system.
- Unzip the Eclipse Platform to a directory on your hard drive.
- Run the Eclipse Platform. You will ask to create a workspace. Create a workspace separate from any Java or C++ workspaces you may already have created. If this is your first time using Eclipse, the default is fine.
- Proceed to the workbench by clicking the icon with the arrow titled Workbench in the top right corner of the Eclipse window.
- Select the menu item Help > Install New Software.... A dialog box titled Install will appear. This contains a plugin installation wizard. The first step of the wizard is titled Available Software.
- At the top of the dialog you will see a combo box labeled Word with:. Click the button to the right of the combo box labeled Add. A dialog box titled Add Repository will appear.
- In the textbox labeled Name: enter Google Chrome Developer Tools. In the textbox labeled Location: enter http://chromedevtools.googlecode.com/svn/update/dev/. Click OK.
- Now select Google Chrome Developer Tools – http://chromedevtools.googlecode.com/svn/update/dev/ from the Work with: combo box. Google Chrome Developer Tools will appear in the table below. Click the checkbox next to Google Chrome Developer Tools in the table. Click the button labeled Next > at the bottom of the dialog box. The next wizard step titled Install Details is displayed.
- Click the button labeled Next >. The next wizard step titled Review Licenses is displayed.
- Once you are satisfied with the licenses, you can select the I accept the terms of the license agreement radio button and click the button labeled Finish. A progress dialog box titled Installing Software will be displayed. After installation is complete click the Restart Now button.
- Eclipse will restart with the V8 Eclipse Debugging Plugin installed.
- NOTE: Installation directory can be anywhere so long as you properly set your /etc/environment path (described later).
- Download the Node.js tar from http://nodejs.org/
- Extract the downloaded tar.

- Change to root user

- Create a directory for where Node.js will be installed (we will use /usr/src/nodejs for this documentation).

- Go into the node-v0.2.0 directory.
- Run configure script in the node-v0.2.0 directory. e.g. ./configure --debug --prefix=/usr/src/nodejs

- NOTE: Make sure you are starting with a clean build in the event you have build already e.g. make clean
- Add GCC environmental variable needed for installation e.g. export GCC_VERSION=44
- Build e.g. make

- Install e.g. make install

- Edit path so that Node.js can be executed globally e.g. vim /etc/environment --> PATH="/usr/local/sbin:/usr/local/bin:/usr/sbin:/usr/bin:/sbin:/bin:/usr/games:/usr/src/nodejs/bin"
- Set execution path for Node.js e.g. . /etc/environment

- Logout from root and re-run the /etc/environment script to set the path

Running Node.js:
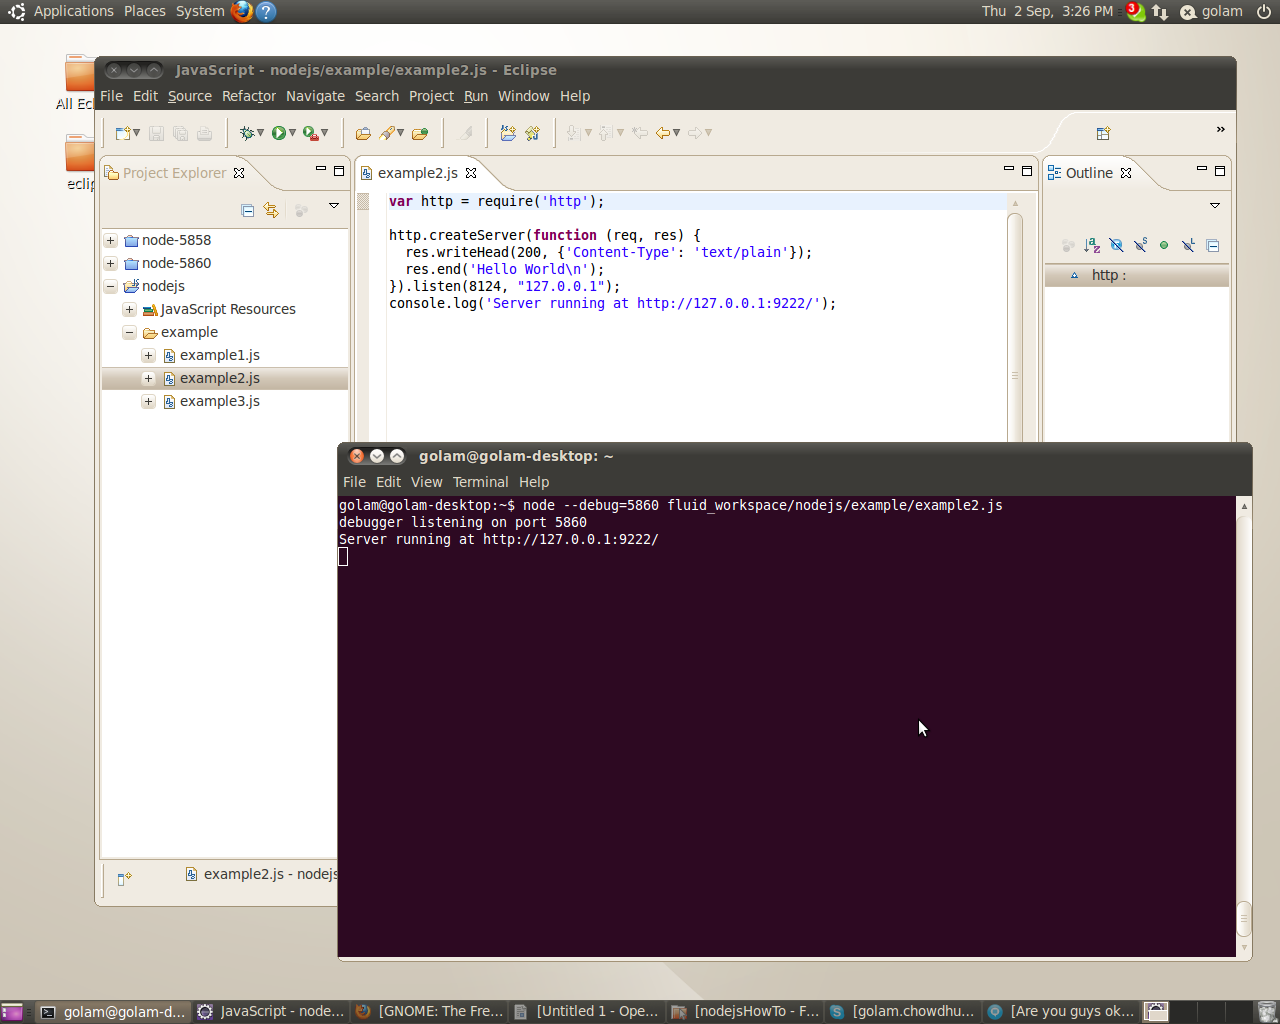
- Add the following code to a file under a project in your eclipse project explorer
var http = require('http');

http.createServer(function (req, res) {
res.writeHead(200, {'Content-Type': 'text/plain'});
res.end('Hello World\n');
}).listen(8124, "127.0.0.1");
console.log('Server running at [http://127.0.0.1:8124/]');
- Open terminal then run the following commend and make sure to change the path to where the javascript file is located
- node --debug=5858 /path/example.js
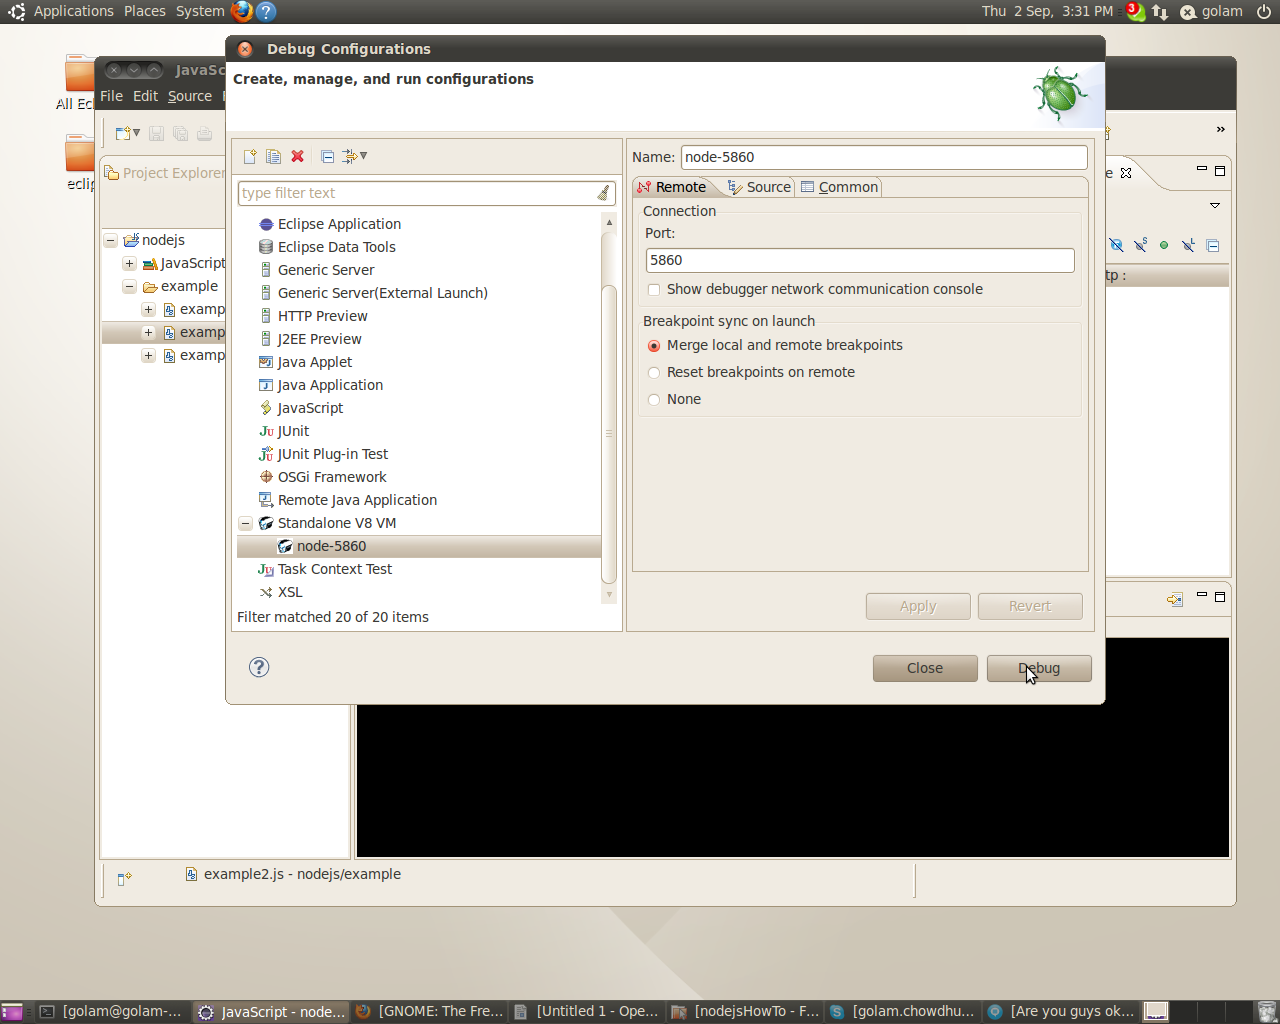
Set up Node.js V8 Debugger in Eclipse:
- Let's configure the debugger in eclipse by right clicking on the file we have created earlier then select Debug As followed by Debug Configurations then click Dedug once you have entered all the information shown on the screen shots
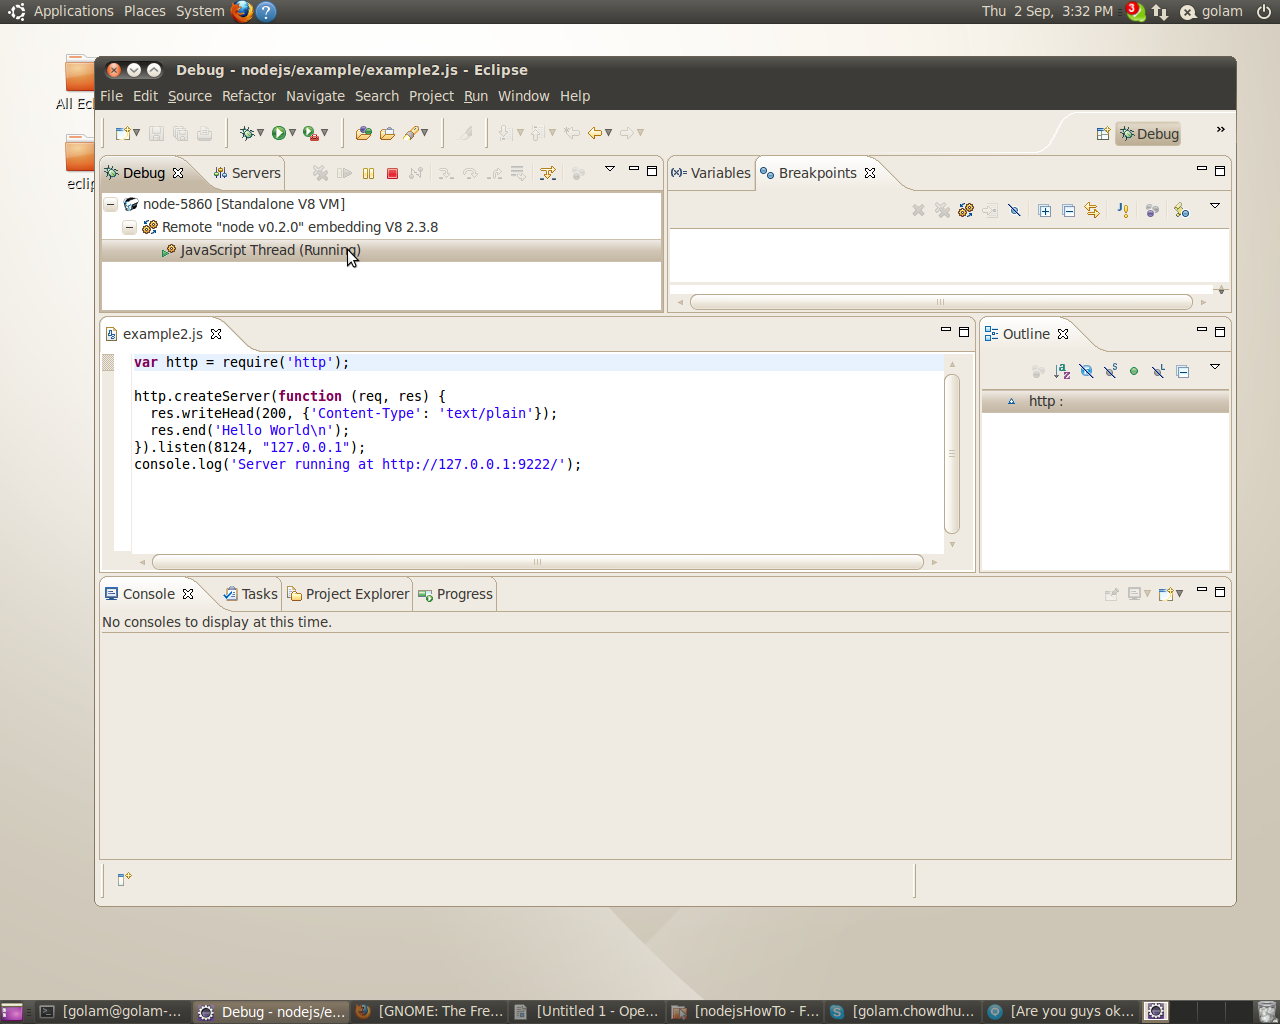
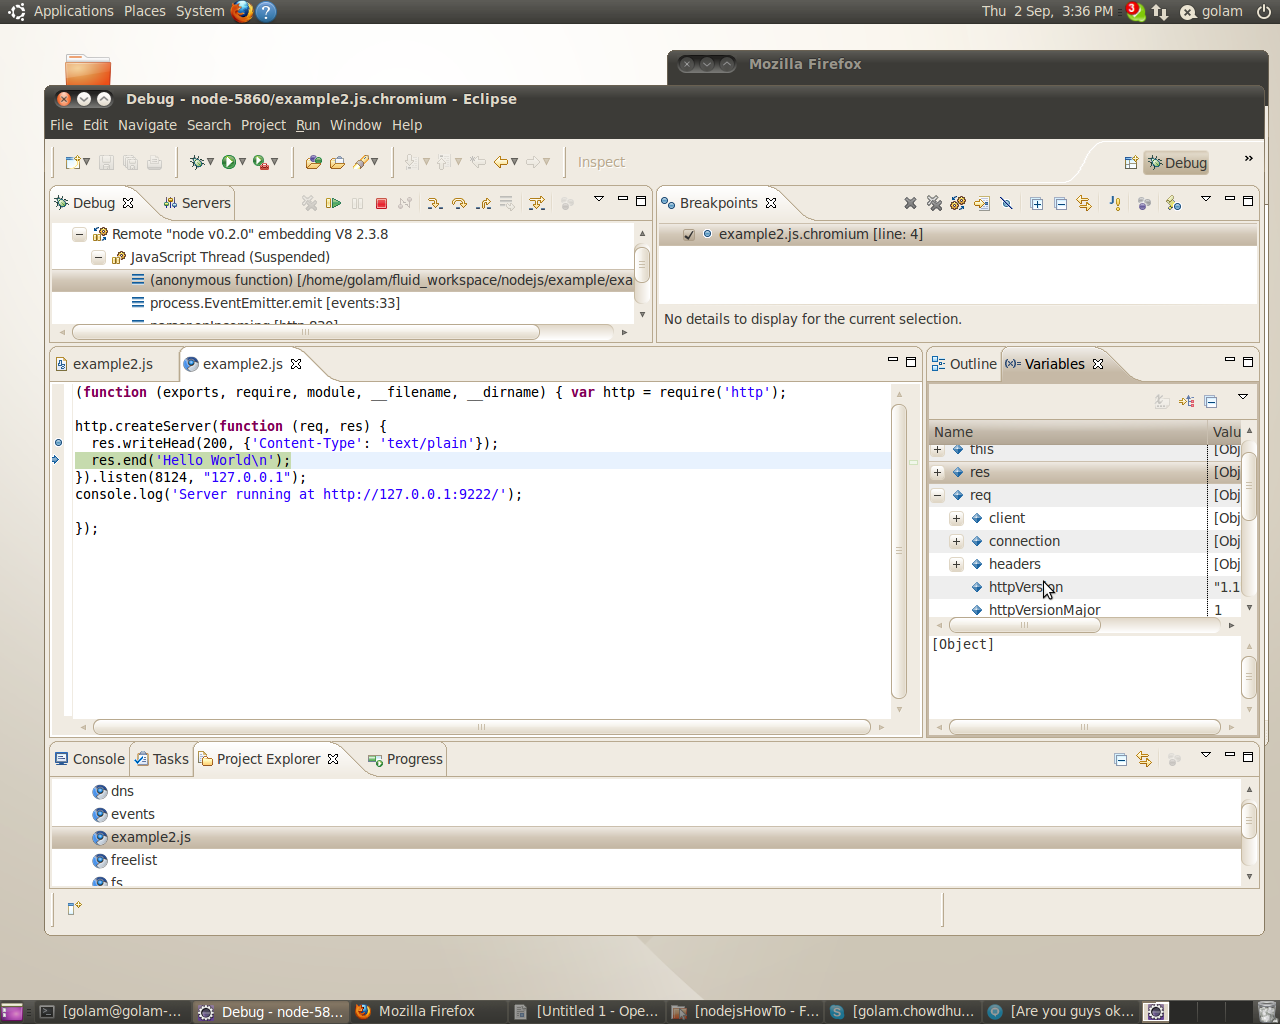
- Now changed to debug perspective by clicking Window then Open Perspective followed by Debug
- Note
- Do not place the break points in the original file
- To place break points go to Project Explorer tab then select the folder which has the same name as the debug configuration then select the javascript file you would want to add break points

- Open browser then and add the following link http://127.0.0.1:8124
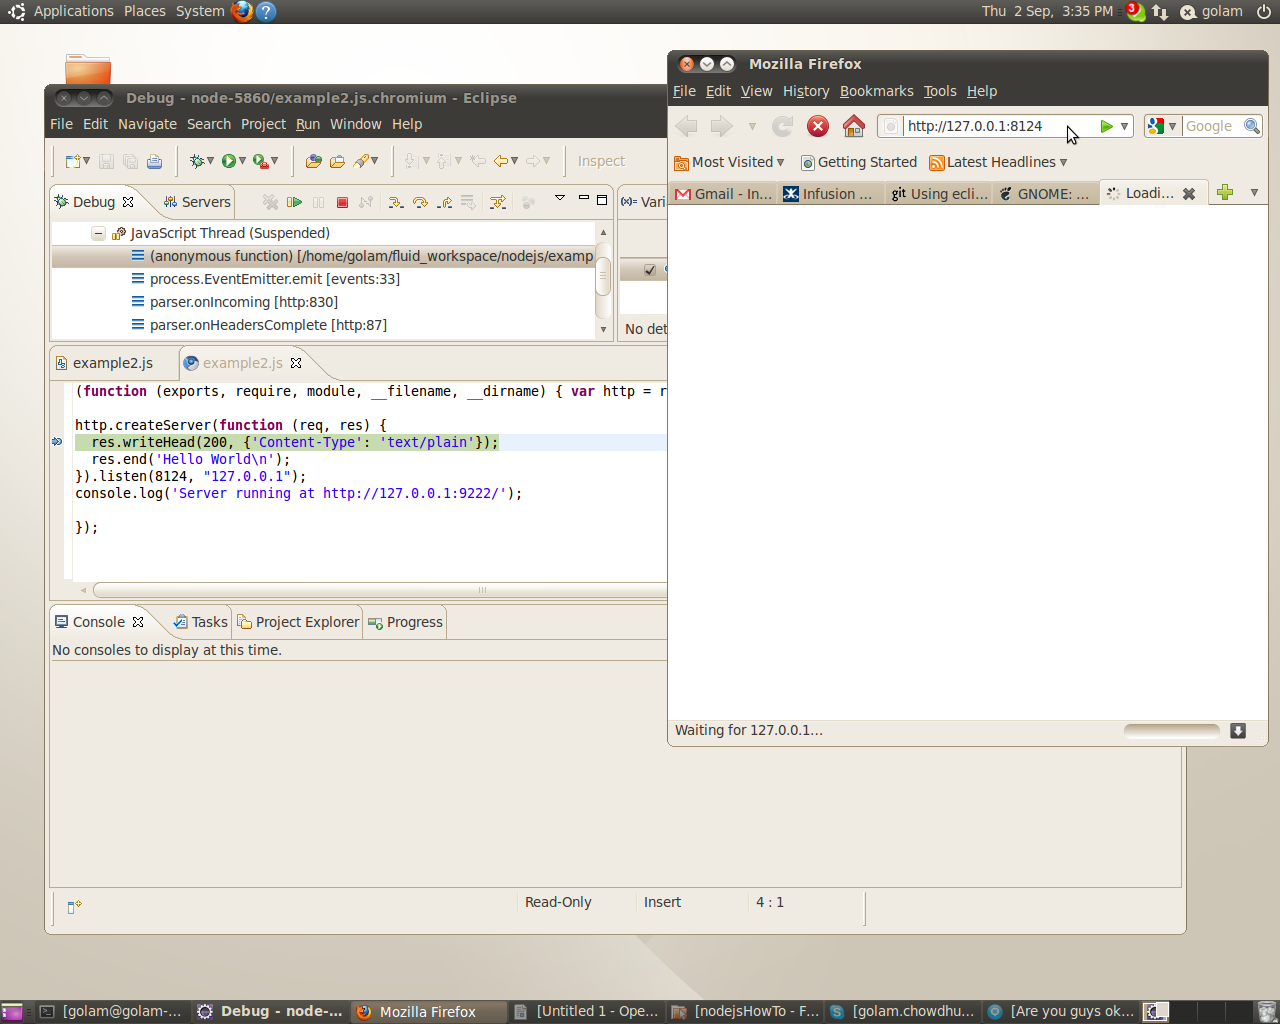
- You should see the highlighted line of the code
- MORE TO FOLLOW