Getting Started With Node.js and V8 Debugger
Installation steps:
- Download a clean slate Eclipse Platform for your operating system.
- Unzip the Eclipse Platform to a directory on your hard drive.
- Run the Eclipse Platform. You will ask to create a workspace. Create a workspace separate from any Java or C++ workspaces you may already have created. If this is your first time using Eclipse, the default is fine.
- Proceed to the workbench by clicking the icon with the arrow titled Workbench in the top right corner of the Eclipse window.
- Select the menu item Help > Install New Software.... A dialog box titled Install will appear. This contains a plugin installation wizard. The first step of the wizard is titled Available Software.
- At the top of the dialog you will see a combo box labeled Word with:. Click the button to the right of the combo box labeled Add. A dialog box titled Add Repository will appear.
- In the textbox labeled Name: enter Google Chrome Developer Tools. In the textbox labeled Location: enter http://chromedevtools.googlecode.com/svn/update/dev/. Click OK.
- Now select Google Chrome Developer Tools – http://chromedevtools.googlecode.com/svn/update/dev/ from the Work with: combo box. Google Chrome Developer Tools will appear in the table below. Click the checkbox next to Google Chrome Developer Tools in the table. Click the button labeled Next > at the bottom of the dialog box. The next wizard step titled Install Details is displayed.
- Click the button labeled Next >. The next wizard step titled Review Licenses is displayed.
- Once you are satisfied with the licenses, you can select the I accept the terms of the license agreement radio button and click the button labeled Finish. A progress dialog box titled Installing Software will be displayed. After installation is complete click the Restart Now button.
- Eclipse will restart with the V8 Eclipse Debugging Plugin installed.NOTE: Installation directory can be anywhere so long as you properly set your /etc/environment path (described later).
- Download the Node.js tar from http://nodejs.org/
- Extract the downloaded tar.

...
- Create a directory for where Node.js will be installed (we will use /usr/src/nodejs for this documentation).
- NOTE: Installation directory can be anywhere so long as you properly set your /etc/environment path (described later).

- Go into the node-v0.2.0 directory.
- Run configure script in the node-v0.2.0 directory. e.g. ./configure --debug --prefix=/usr/src/nodejs

- NOTE: Make sure you are starting with a clean build in the event you have build already e.g. make clean
- Add GCC environmental variable needed for installation e.g. export GCC_VERSION=44
- Build e.g. make

- Install e.g. make install

...
- Logout from root and re-run the /etc/environment script to set the path

Running and Testing Node.js:
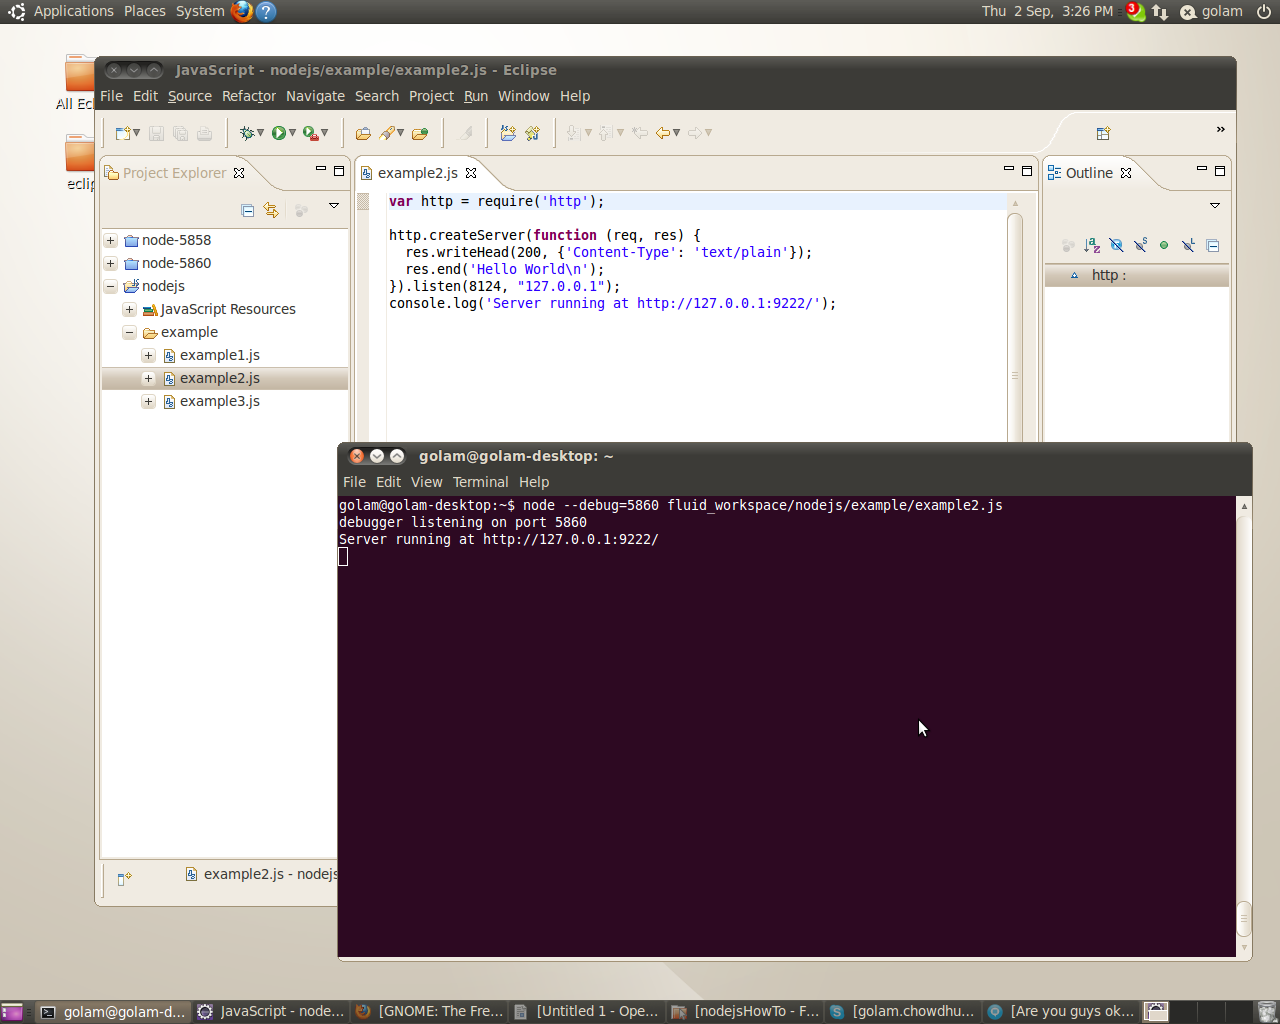
- Add To test that Node.js is running properly, add the following sample code to a file under a project in your eclipse project explorer
Code Block var http = require('http'); http.createServer(function (req, res) { res.writeHead(200, {'Content-Type': 'text/plain'}); res.end('Hello World\n'); }).listen(8124, "127.0.0.1"); console.log('Server running at [http://127.0.0.1:8124/]');
- Open terminal then and run the following commend and make command: node --debug=5858 /path/example.js
- NOTE: Be sure to change the path to where the javascript file is locatednode --debug=5858 /path/example.js
...
Configure Node.js V8 Debugger in Eclipse:
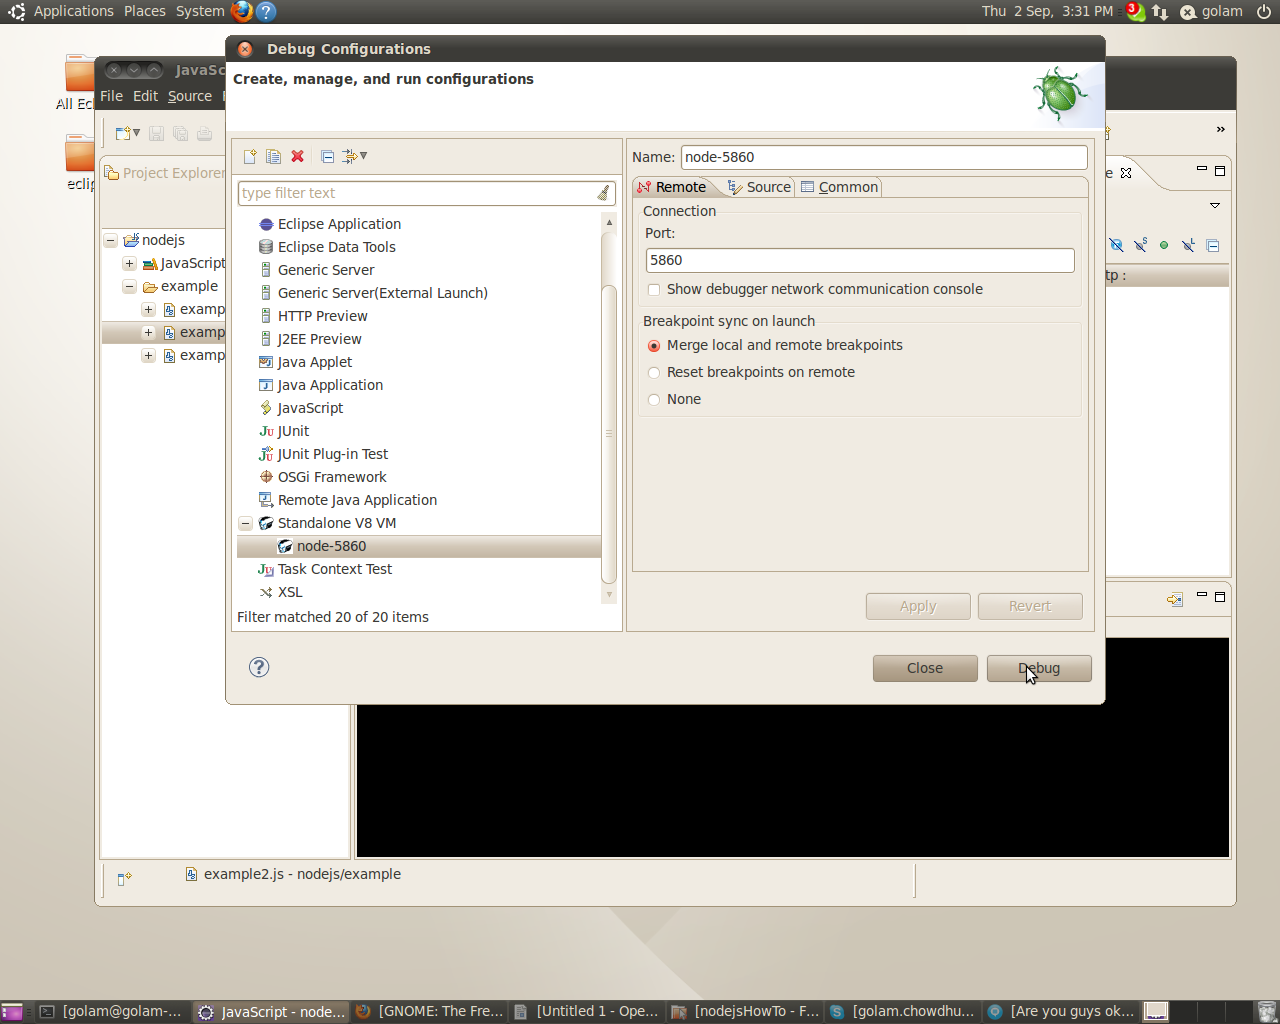
- Let's configure the debugger in eclipse by right-clicking on the file we have created earlier then select . Select 'Debug As' followed by 'Debug Configurations then click Dedug '. Click Debug once you have entered all the information shown on the screen shots
...
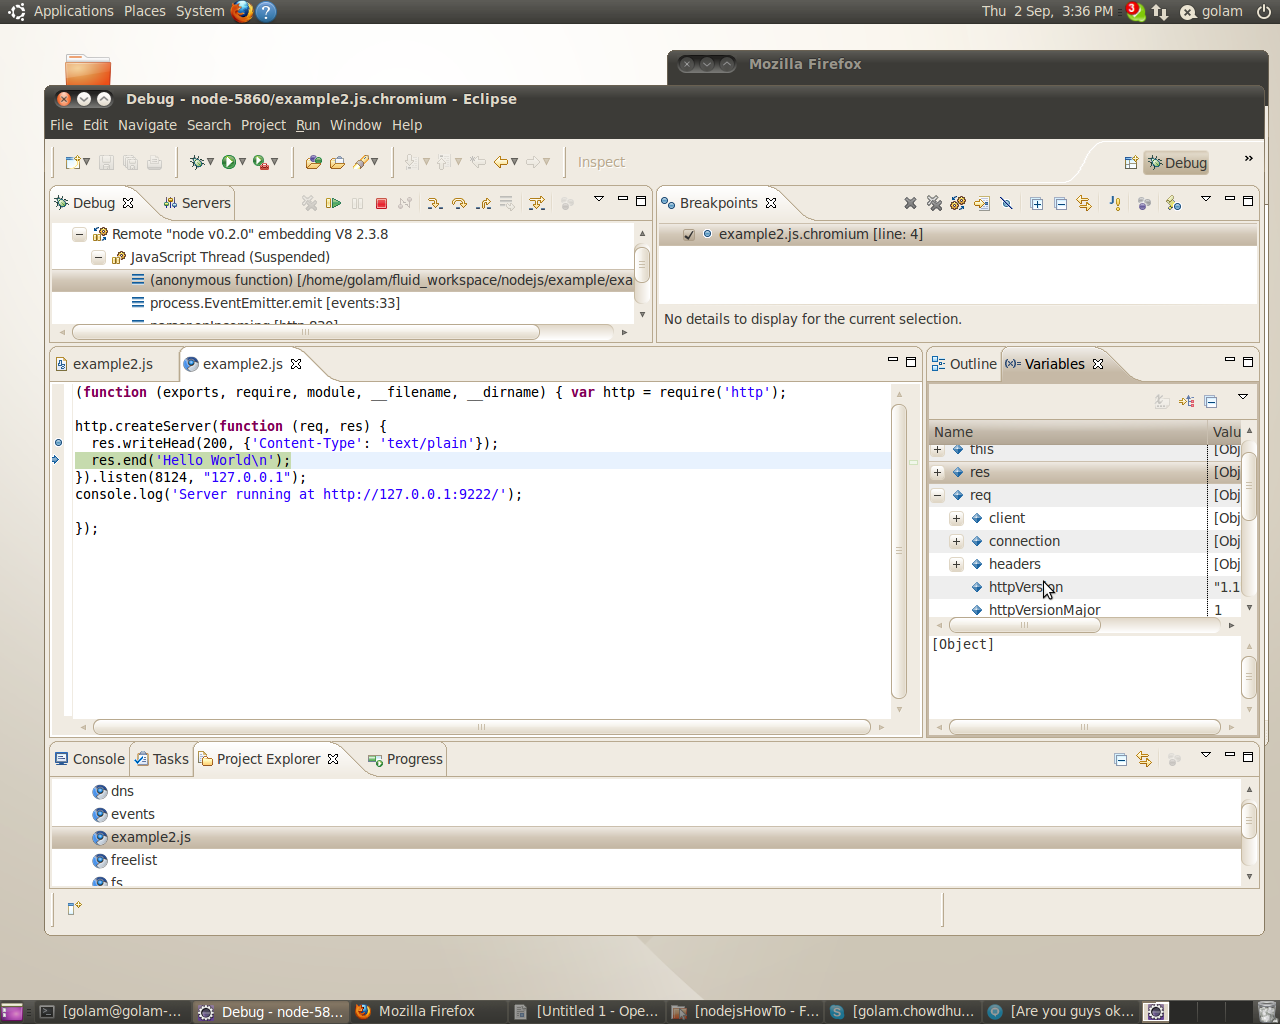
- You should see the highlighted line of the code
 MORE TO FOLLOW