| Warning |
|---|
Full Renderer support has been added to the Pager, providing a data-driven mode – this is the recommended way of using the Pager. For a tutorial describing how to use the data-driven Pager, see Pager Tutorial. This tutorial describes a more complex scenario where you supply your own markup to the Pager. Look for a new tutorial soon. |
| Section | |||||||||||||||||||||||||||||||||||||||||||||||||||||||||||||||||||
|---|---|---|---|---|---|---|---|---|---|---|---|---|---|---|---|---|---|---|---|---|---|---|---|---|---|---|---|---|---|---|---|---|---|---|---|---|---|---|---|---|---|---|---|---|---|---|---|---|---|---|---|---|---|---|---|---|---|---|---|---|---|---|---|---|---|---|---|
|
...
| Include Page | ||||
|---|---|---|---|---|
|
...
Step 1: Prepare your markup
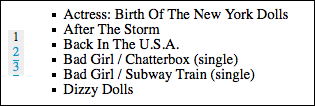
This tutorial shows how to use the Pager in an entirely mark-up driven approach. This means that you will provide all the markup yourself instead of having the Pager generate it.
...
| Section | |||||||||||
|---|---|---|---|---|---|---|---|---|---|---|---|
|
...
That's all - these are the only changes you need to make to your HTML.
...
Step 2: Write the script
You'll need to create a file, say search-results.js, to contain your initialization script - the script you write to apply the Pager to your search results mark-up.
...
BUT: doing this alone is not sufficient. As mentioned above, the Pager is mark-up driven. As far as your script is concerned, this means that the Pager itself doesn't know what to do when a page link is clicked. All the Pager can do is call a function that you provide. You have to write that function.
The onModelChange Callback
Since the Pager doesn't actually know anything about your data, you have to take care of displaying the different pages of data yourself. The onModelChange function is used for this purpose.
...
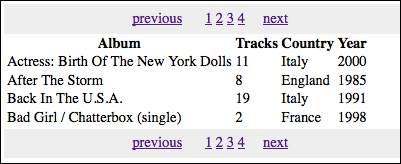
In the scenario of this tutorial, you're creating a web front-end for your CD library, and using the Pager to chunk up search results. In this case, you would have to write a function that accepts the page number and in response, updates the page display with the relevant list of CDs from your search results.
...
Step 3: Add the script to your HTML
You'll need to add your initialization script, along with the Fluid library, to you HTML file. In the header of the file, link to the Javascript files with <script> tags:
...
But all of these individual files are not necessary to make it work - the InfusionAll.js file has everything you need.
...
Step 4: Apply styles
| Section | ||||
|---|---|---|---|---|
|
...
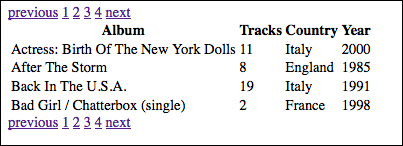
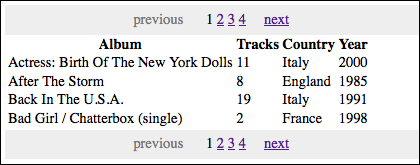
If we add a stylesheet with these styles, then when looking at the first page of search results, the page links will look like this:
| Center |
|---|
 |