...
Obtaining Unicode in Windows
- Install the custom TTF font to the OS (usually a right-click then select "Install" from the context menu).
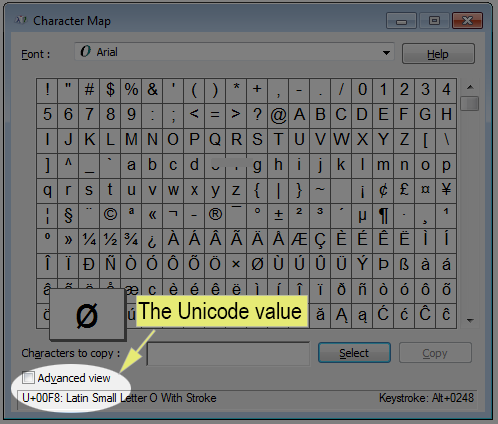
- Run Character Map (done by searching the Start menu, or by typing Win+R then "charmap").
- Select the custom font from the Font drop-down menu. The glyphs in the custom font should now appear in the window.
- Select a character in the window. The Unicode will appear in the bottom-left corner in the status bar.
Obtaining Unicode in Mac OS X 10.6 or Later
- Enable Special Characters support as documented in this Apple Knowledge Base article: OS X Lion: Enter special characters and symbols
- Install the custom TTF font to the OS (usually double-click, then "Install").
- Launch the Font Book application.
- Also launch the Notes application.
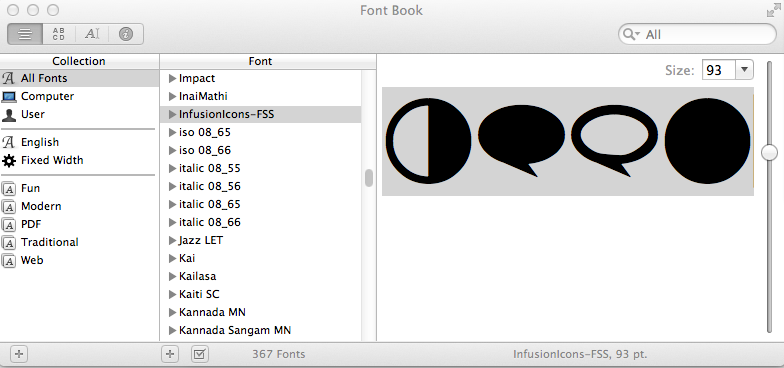
- In Font Book, locate the custom font under Collection > All Fonts. Select it. The custom font should now appear in the window.
- In Font Book, select / highlight the characters from the custom font. Select Copy (Command+C or right-click -> Copy).
- In Notes, Paste the text (Command+V or right-click -> Paste). The custom font should appear in Notepad.
- In Notes, select the pasted text. Then open the "Edit" menu an select "Special Characters".
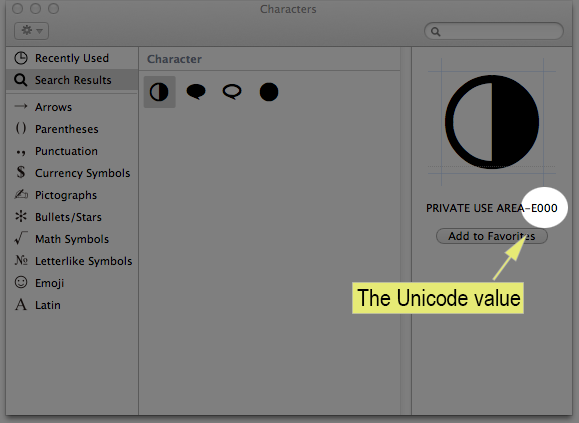
- Now a "Characters" window appears with "Search" results containing each character selected in the previous step.
- Select an icon in the "Character" panel. The Unicode will appear in the right column.
Above: An image showing the Mac OS X Font Book application with the custom characters highlighted.
Above: An image showing the Mac OS X Characters window. The Unicode value for a custom character appears in the right most column.


